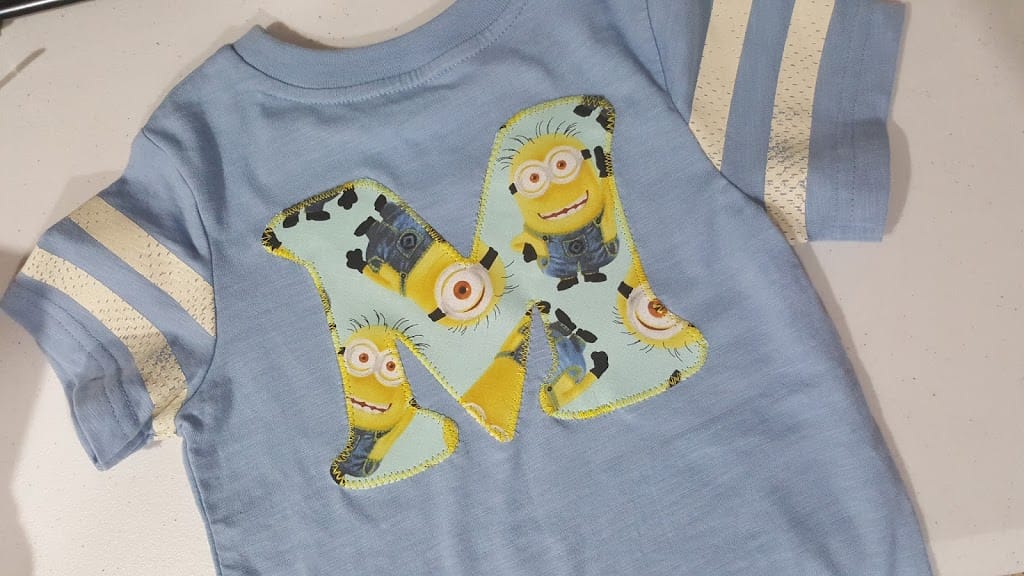
In preparing for our first trip to Disney World, I knew I wanted to make something unique for my boys to wear, but wasn’t sure what! One thing I knew was that I wanted a big, bold design, and something bigger than my 7″ by 7″ fast frame could handle. I remembered seeing some really easy projects using a paper template, fabric, Heat-n-Bond Lite (HNBL), and a sewing machine. I have all of those, so I jumped in!
Print out your letter, and cut it out. Cut out a piece of fabric in approximately the same dimensions of your letter. Cut a matching piece of Heat-n-Bond Lite, and place onto your shape. Iron on Medium to High heat for ten seconds, textured “bond” side facing the wrong side of your fabric. You now have a square with the paper side of hnbl facing out.

Wait a minute for the hnbl to cool. Take your template object (in my case, a letter), and decide how you’re going to trace it onto your fabric. I like to turn it backwards and trace with a pen onto the hnbl paper. This way, no one will ever see the outline you’ve made.
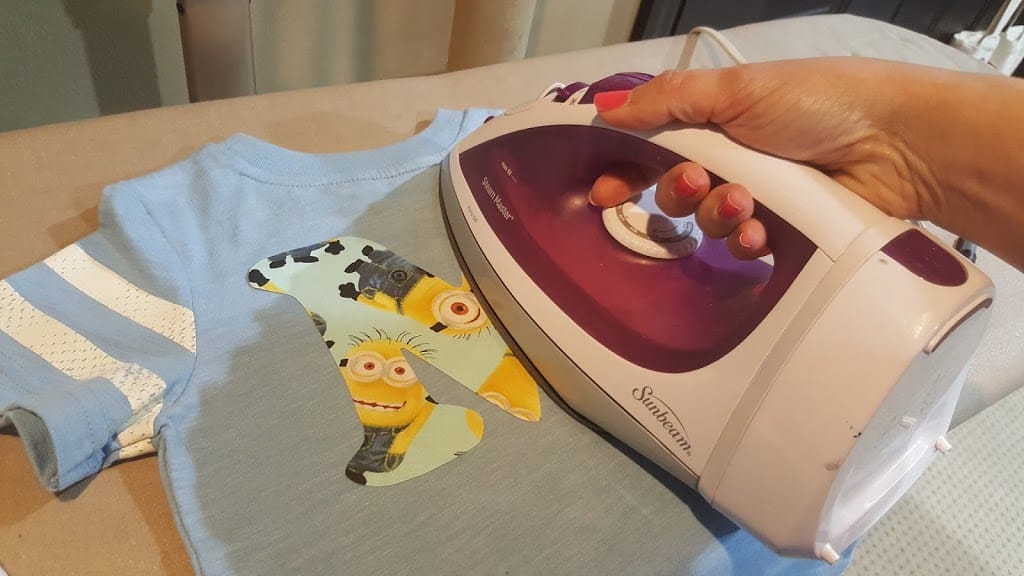
Then cut around the letter and peel the paper off. Place your letter, hnbl down, on the shirt/blank however you would like. Place your iron onto the letter for approximately ten seconds; this heat bonds the fabric to your item. 🙂
The next step is optional, but I like to do it! Flip on your sewing machine, turn the stitch type to your choice of running, zig zag, or a decorative stitch of your choice, and freehand around the edges of your object. I love giving this finishing touch to a fun shirt for my child!